Receiving Payments
Accept BTC and USDT payments on your website using the Blockonomics API — from checkout to confirmed callback.
Setup
Complete these steps before accepting payments:
1. Add a Wallet
- Go to Wallets in your Blockonomics dashboard
- Click Add a wallet
- Select the cryptocurrency (BTC or USDT)
- Fill out the wallet form and click Create wallet
2. Add a Store
- Go to Stores in your dashboard
- Click Add a store
- Fill out the store form and click Create Store
- Enable crypto on the store and select the desired wallet
- Set a callback URL — the endpoint on your server that receives payment notifications
If you're developing locally, use ngrok to expose a local callback URL.
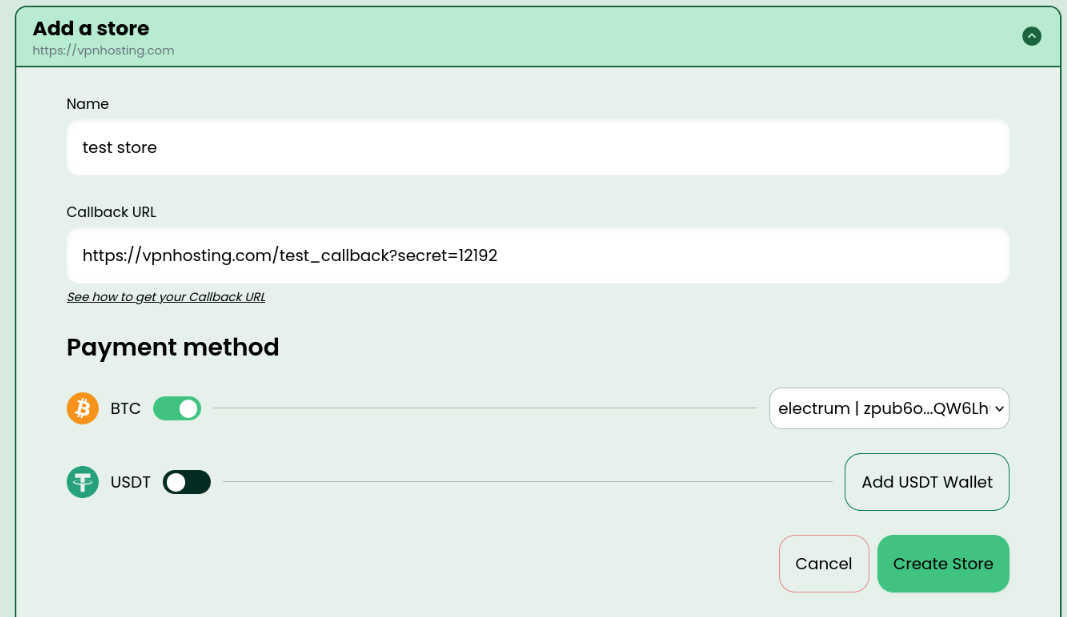
The dashboard setup screen shows the Wallets section where you select a cryptocurrency and paste your xPub or wallet address, and the Stores section where you name your store, enable a cryptocurrency, attach a wallet, and enter your callback URL. Both steps must be completed before generating payment addresses.
Payment Flow Overview
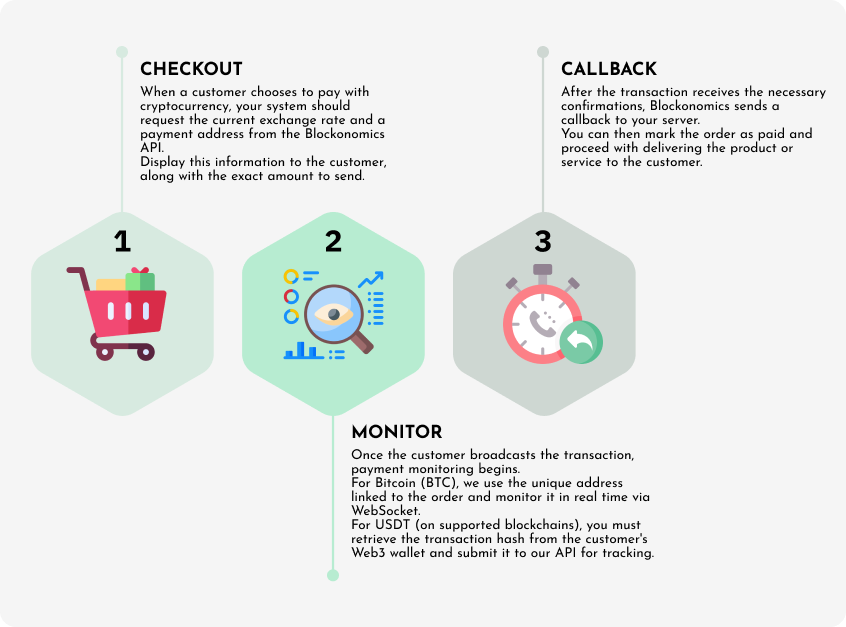
Every payment goes through three phases regardless of cryptocurrency:
- Checkout — your server generates a unique payment address and converts the fiat total to crypto. The customer sees the address and amount on your checkout page.
- Monitor — after the customer sends funds, a WebSocket connection or component detects the unconfirmed transaction instantly so you can show an order confirmation screen.
- Callback — once the transaction reaches enough on-chain confirmations, Blockonomics sends an HTTP GET request to your callback URL. Mark the order as paid and fulfill it at this point.
BTC Payment Flow
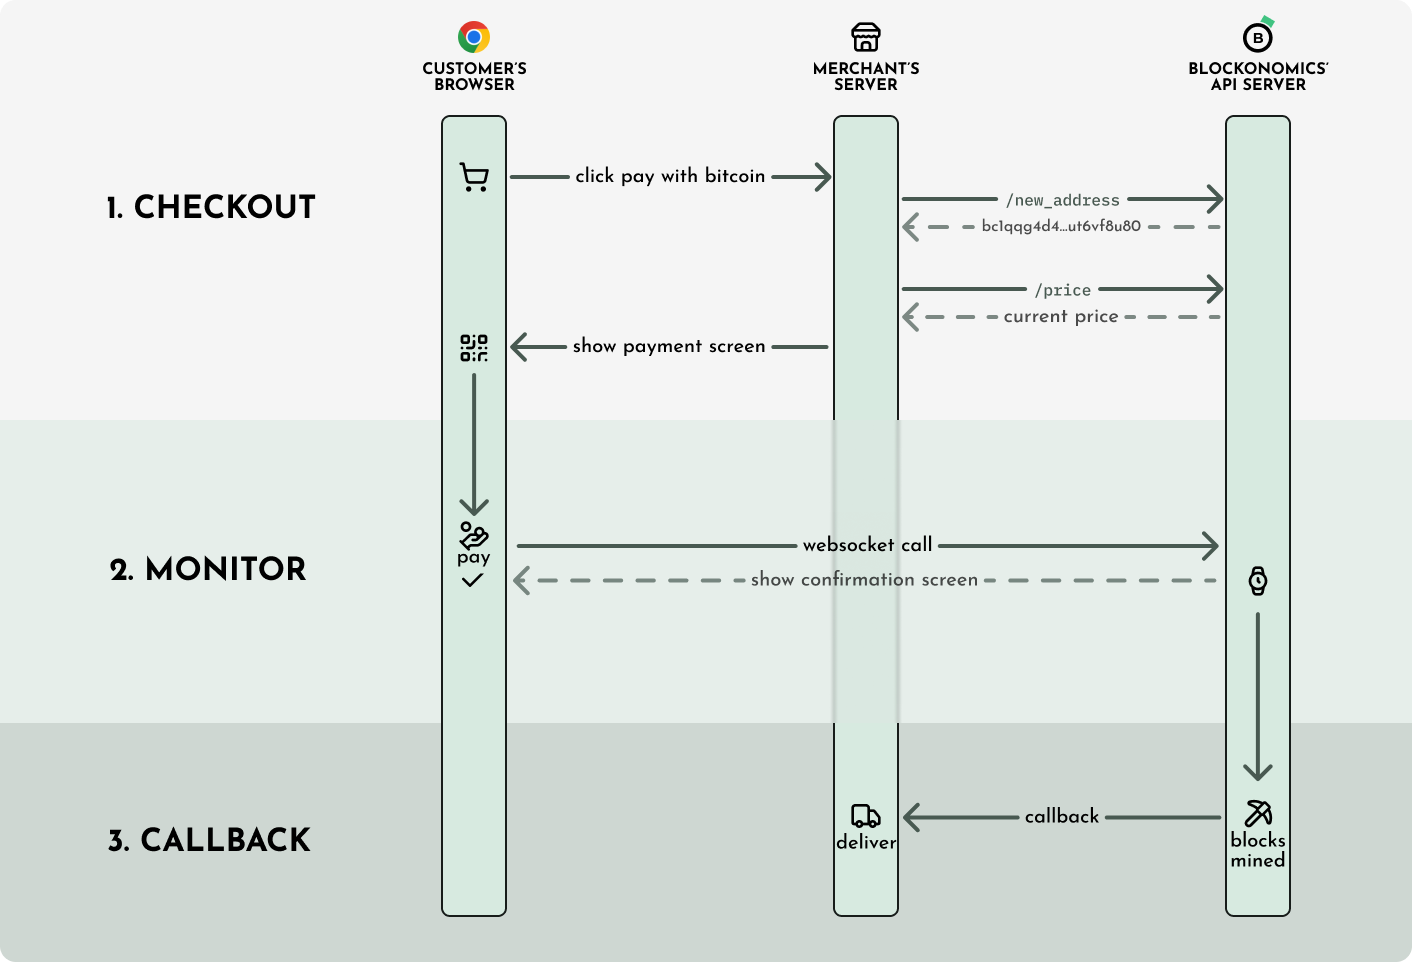
The BTC payment flow starts when the customer clicks pay: your server calls the new-address endpoint to get a unique Bitcoin address, and the price endpoint to convert the fiat total to BTC. Your checkout page displays the address and BTC amount. A WebSocket connection to wss://www.blockonomics.co/payment/{address} detects the transaction the moment it enters the mempool. When the transaction reaches 2+ on-chain confirmations, Blockonomics sends an HTTP callback to your server.
Checkout
When a customer checks out, show them a unique Bitcoin address and the amount to pay in BTC. Your server must call:
- Create or Get Payment Address — generates a unique BTC address for this order
- Fetch cryptocurrency price — converts the fiat total to BTC
# Generate a unique address
curl -X POST "https://www.blockonomics.co/api/new_address?match_callback=yoursite.com&crypto=BTC" \
-H "Authorization: Bearer YOUR_API_KEY"
# Fetch live BTC price
curl "https://www.blockonomics.co/api/price?crypto=BTC¤cy=USD"Bitcoin addresses generated by Blockonomics never expire. The 10–15 minute timer on checkout pages is only to lock in the price, not the address.
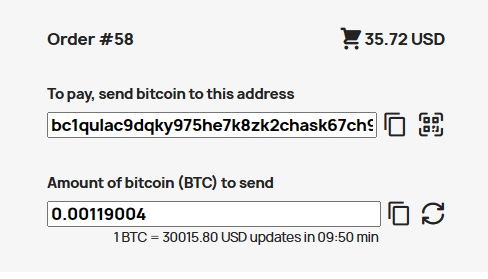
The BTC checkout screen shows a QR code and the raw Bitcoin address the customer must send to, the exact amount in BTC (converted from the fiat total at the moment of checkout), and a countdown timer that locks in the quoted price. The customer can scan the QR code with any Bitcoin wallet to pre-fill the address and amount.
Monitor
After the customer sends Bitcoin, use the WebSocket to detect the unconfirmed transaction instantly and show an order confirmation screen:
wss://www.blockonomics.co/payment/{address}
Never deliver a product based on a WebSocket notification alone. Unconfirmed transactions can be reversed. Use the server-side callback below to confirm.
The payment monitor screen is shown to the customer after they send Bitcoin, while your server waits for confirmations. It displays the transaction ID, the amount sent, the current confirmation count, and a progress indicator. The screen updates in real time as confirmations arrive. Your server should only fulfill the order after receiving a callback with status >= 2.
Callback
When the transaction reaches 2+ confirmations, Blockonomics sends an HTTP callback to your configured URL. Mark the order as paid and deliver the product at this point. See the Callbacks guide for full details.
USDT (ETH ERC-20) Payment Flow
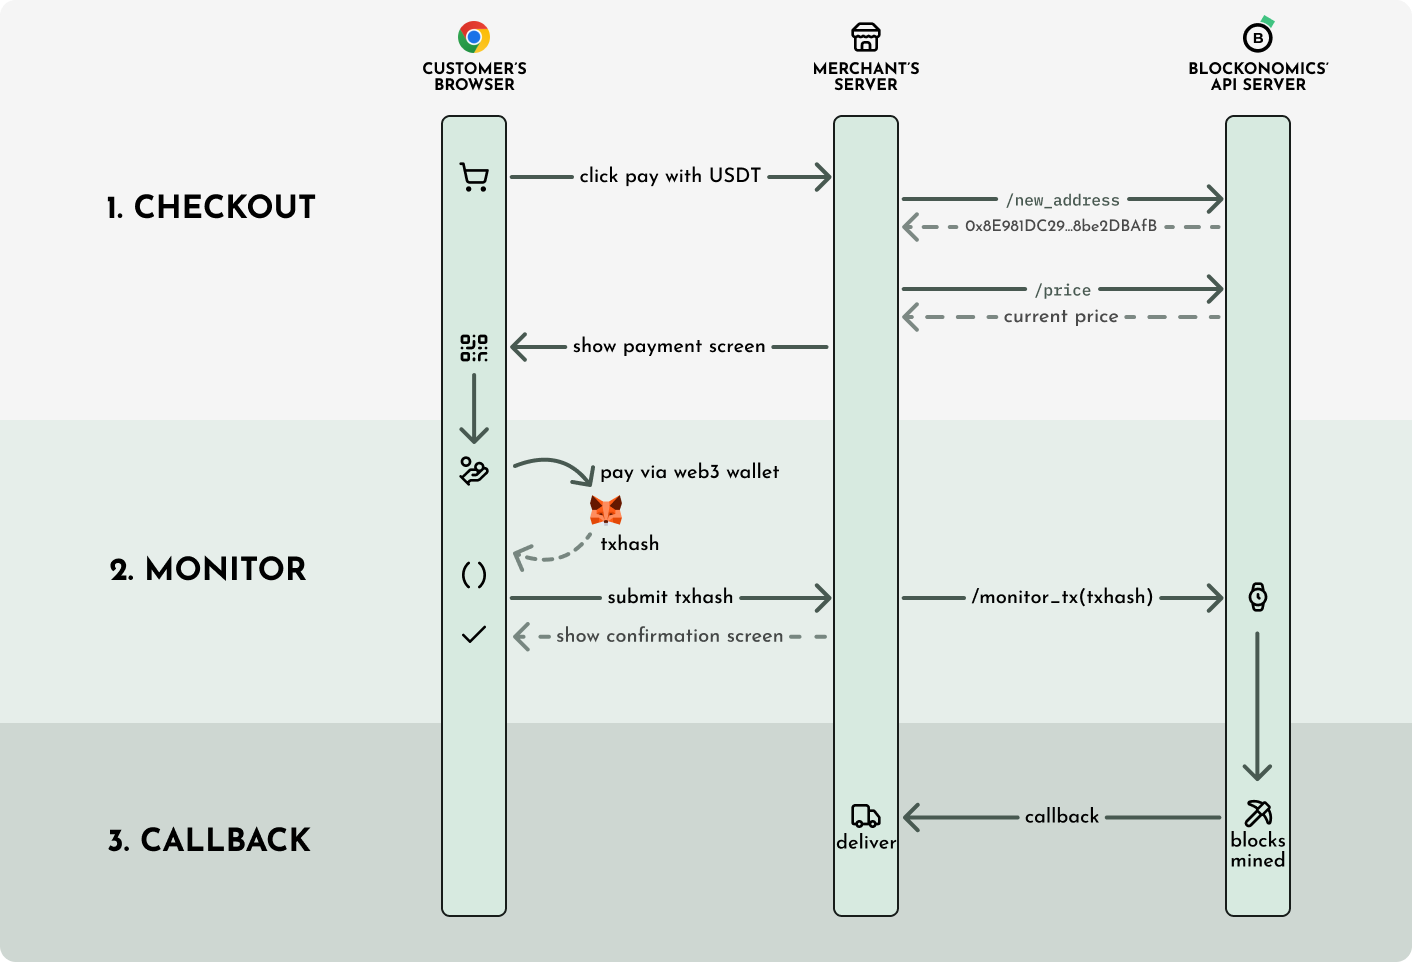
The USDT payment flow starts when the customer clicks Pay with USDT: your server calls the new-address endpoint to get an Ethereum address. Your checkout page embeds the Web3 USDT Component, which prompts the customer to connect their browser wallet (MetaMask or compatible). The customer signs the ERC-20 transfer transaction in their wallet. Your server calls the monitor-tx endpoint with the resulting transaction hash. When the transaction is confirmed on-chain, Blockonomics sends an HTTP callback to your server.
Checkout
When the customer clicks Pay with USDT, your server calls Create or Get Payment Address to get an Ethereum address:
curl -X POST "https://www.blockonomics.co/api/new_address?crypto=USDT" \
  -H "Authorization: Bearer YOUR_API_KEY"
For the price, use the price endpoint with crypto=USDT:
curl "https://www.blockonomics.co/api/price?crypto=USDT¤cy=EUR"
# Returns the value of 1 USDT in EUR directlyMonitor
Display the Web3 USDT Component on your checkout page. This lets the customer connect their MetaMask or other browser wallet and sign the transaction.
After the customer approves, the component emits onTxnSubmitted with the txhash. Your server must then call Monitor USDT Transaction with that txhash so Blockonomics knows to send a callback when it confirms.
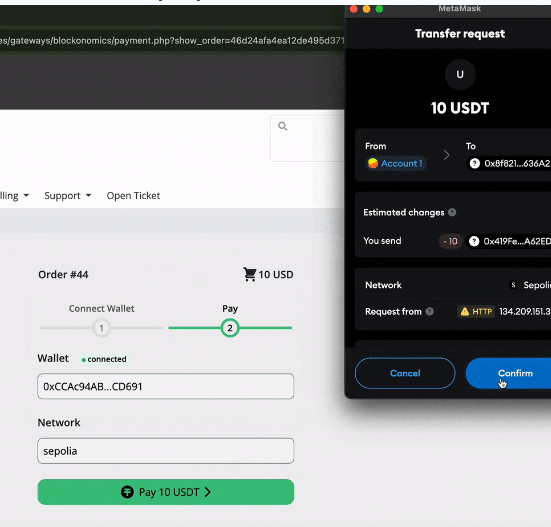
The USDT checkout screen shows the Ethereum address the payment must be sent to, the amount in USDT, and a Connect Wallet button. When the customer clicks it, the Web3 USDT Component opens a wallet selection prompt (MetaMask, WalletConnect, etc.). After connecting, the component shows the transaction details and a Send button. The customer approves the ERC-20 transfer in their wallet extension, and the component emits the transaction hash back to your page.
Callback
Blockonomics sends a callback when the USDT transaction is confirmed on-chain. USDT values in callbacks are in base units (6 decimal places), not satoshis.